Table of Contents
ToggleA TV accent wall can completely reshape how your living room feels, whether you’re going for moody sophistication, rustic charm, or clean modern lines. The wall behind your TV is arguably the biggest visual anchor in most homes, yet many people leave it blank or slap on standard drywall. If you’re ready to stop scrolling through inspiration boards and actually tackle a tv wall accent project, you’ve got more options than you think. This guide walks through seven distinct approaches, from budget-friendly paint to statement-making materials, so you can pick what fits your space, skill level, and timeline.
Key Takeaways
- TV accent wall ideas range from budget-friendly bold paint to premium materials like stone and tile, each offering distinct aesthetic and installation complexity.
- Proper surface preparation—including priming, sanding, and filling imperfections—is essential for a polished finish regardless of your chosen material.
- Dark paint colors like charcoal, navy, and forest green make your TV pop against contrast while hiding dust and pet hair better than lighter shades.
- Textured wallpaper, shiplap, and faux stone panels add visual dimension and warmth without requiring structural modifications in most cases.
- Strategic lighting from recessed fixtures or wall sconces highlights your accent wall while preventing glare on the TV screen and eye strain for viewers.
- Always inspect for studs, electrical wires, and plumbing before drilling or nailing; test your color or material choice on a small section first to avoid costly mistakes.
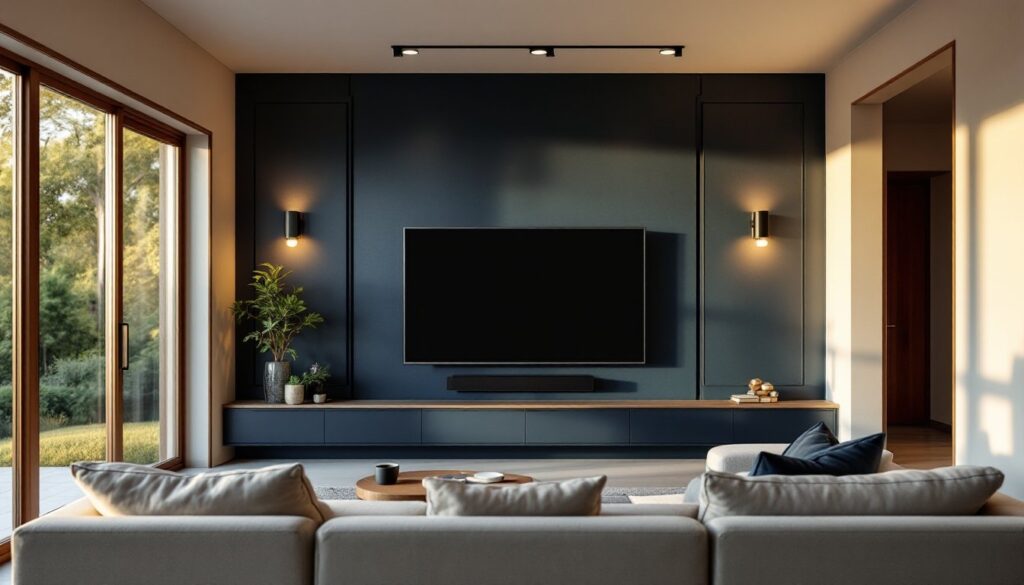
Bold Paint Colors for Maximum Impact
Paint is the fastest, cheapest way to transform a tv accent wall. A deep color, charcoal, navy, forest green, or even warm terracotta, instantly draws focus and makes your screen pop against contrast. The key is picking a color that doesn’t fight your lighting. Test samples on the actual wall at different times of day: paint looks different in morning light versus evening lamplight.
Prep is everything. Fill any drywall gaps or imperfections with spackling compound, sand smooth, prime with a quality primer (especially if you’re covering existing color), and use a semi-gloss or satin finish rather than flat, it handles the glow from the TV better and is easier to clean. Two coats of quality paint is standard: budget 3–4 hours for a 12×10 wall including drying time between coats. If your wall has textured drywall (popcorn), consider having it professionally removed first: texture paint doesn’t adhere as cleanly and looks inconsistent.
Accent walls work best when they complement, not compete. Keep your furniture, trim, and ceiling neutral so the wall becomes the focal point. Dark paint also hides dust and pet hair better, a practical win if you’ve got kids or pets.
Textured Wallpaper and Patterned Designs
Patterned wallpaper or textured designs give dimension without the weight of solid materials. Modern accent wall wallpapers come in vinyl, non-woven, or fabric-backed varieties: vinyl is most forgiving for beginners and cleans easily. Patterns range from geometric to botanical to abstract, pick something with visual interest but not so busy it overwhelms the room.
Application requires a clean, smooth wall surface. If your wall has imperfections, use a smoothing primer or lightly sand and fill gaps first. Measure twice, most wallpaper comes in standard widths (26–28 inches), and you’ll need to account for pattern matching if the design repeats. Hang your first vertical strip plumb using a level, then overlap each subsequent strip by about a half-inch before trimming the overlap with a straight edge and utility knife. A smoothing tool or plastic squeegee removes air bubbles as you work.
If you’re hesitant about permanent wallpaper, removable peel-and-stick options exist, though they don’t look quite as polished and may not hold on heavily textured walls. Professional hanging costs $50–150 per roll in labor, but DIY is doable if you’re patient. The biggest mistake is rushing the paste application, use enough adhesive and work slowly to avoid wrinkles.
Shiplap and Wood Paneling Solutions
Shiplap delivers that rustic-modern look popular in contemporary living rooms. It’s horizontal wooden boards (typically 6–8 inches wide) with a slight overlap that creates shadow lines. Actual shiplap is expensive (often $3–8 per square foot): affordable alternatives include tongue-and-groove pine or plywood sheets cut to look like shiplap.
Installation requires finding studs in your wall to anchor boards securely. Mark studs with a stud finder, then nail or screw boards horizontally starting at the bottom, working upward. Use 2-inch finish nails or 1.25-inch brad nails, and space fasteners every 16 inches (stud spacing). If you’re building out a full accent wall, a nailer gun speeds the work significantly. Once installed, fill nail holes with wood filler, sand smooth, and finish with paint or stain.
Measure your wall height and width carefully: most walls aren’t perfectly square, so you’ll need to rip-cut (lengthwise trim) boards to fit edges. This is where a table saw or miter saw becomes essential. You may need a permit if you’re adding significant material that affects fire ratings or insulation, especially if you’re in a rental or have HOA restrictions.
Wood paneling offers a similar warm aesthetic with less installation complexity. Full-wall plywood or engineered wood panels go up faster than individual shiplap boards, though they read less refined. Budget $2–4 per square foot for materials and 2–3 days for a full wall installation if you’re new to the work.
Stone and Brick Finishes
A stone or brick accent wall behind the TV conveys permanence and texture, like a focal-point fireplace. Real brick or stone is heavy, may require structural support, and involves mortar work: faux stone veneer panels are lighter and faster to install. Faux options look surprisingly authentic now, especially from 8 feet away on a TV wall.
Faux stone panels typically come in 12–24-inch sections and adhere with construction adhesive or thin-set mortar over a smooth substrate (cement board is ideal: drywall works if your wall is solid). Layout matters: plan the panel arrangement ahead so you avoid skinny pieces at edges. Use a notched trowel to apply adhesive in a waffle pattern, press firmly, and let cure per manufacturer specs (usually 24 hours).
Grout lines between panels can be grouted like real tile for a finished look, or left with minimal spacing for a cleaner aesthetic. Grouting adds time and mess: if you’re a beginner, consider faux stone panels with interlocking edges that don’t require grouting. Seal stone (real or faux) to protect against dust and discoloration.
Cost varies widely: faux stone veneer runs $2–6 per square foot: real stone easily exceeds $15–20 per square foot plus professional installation. The visual payoff is undeniable, a stone accent wall is a statement that signals sophistication and permanence to anyone who enters the room.
Modern Tile and Geometric Patterns
Ceramic, porcelain, or glass tile behind your TV creates a contemporary accent wall that’s durable and visually striking. Geometric tile options, think 3D hexagons, chevron patterns, or oversized format tiles, add personality without reading as busy. Matte finishes feel modern: glossy tile reflects light and can create glare near a screen.
Tile installation requires careful planning and straight substrates. Install cement board over any existing drywall using corrosion-resistant fasteners: cement board won’t swell or fail if moisture ever reaches it. Snap chalk lines to establish plumb (vertical) and level (horizontal) baselines, then apply thin-set mortar with a notched trowel in small sections so it doesn’t dry out.
Place tiles, using spacers to keep grout lines consistent. Let thin-set cure fully (24 hours) before grouting. Grout fills joints, prevents moisture ingress, and completes the look. Sanded grout works for joints wider than 1/8 inch: unsanded for narrower joints. Seal grout once cured to resist staining.
DIY tile work is doable but unforgiving, mistakes are visible. You’ll need a wet saw to cut tiles cleanly, which you can rent for $20–40 per day. If cutting tiles becomes frequent (especially thick porcelain), having a pro handle cuts saves frustration. Budget 3–5 days for a full wall including drying time. Modern tile works beautifully for tv wall accent ideas that feel polished and intentional.
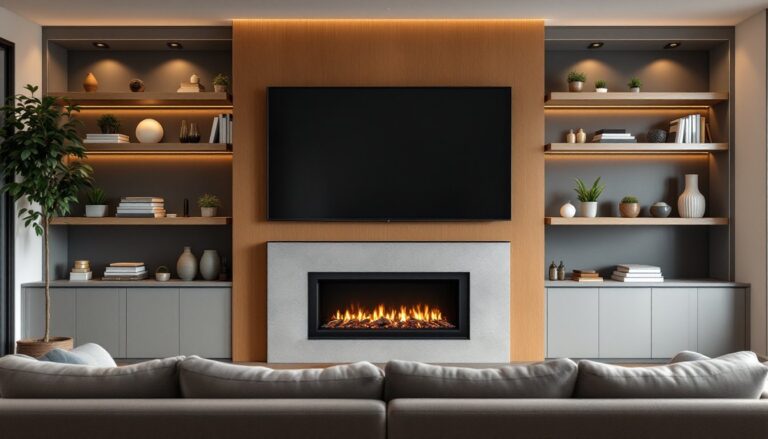
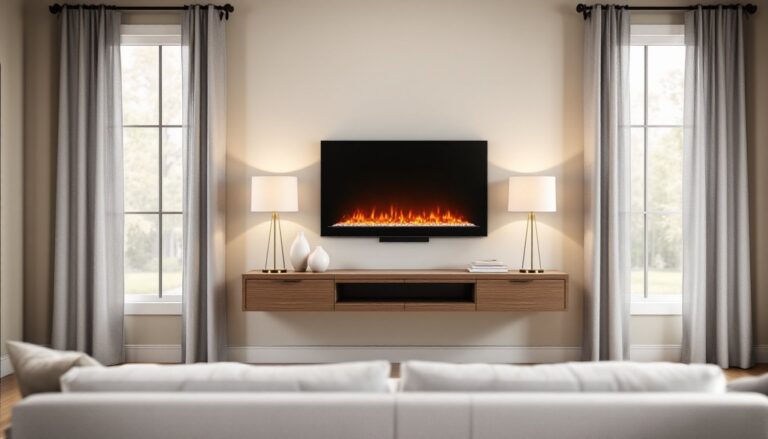
Lighting and Smart Installation Tips
Lighting makes or breaks an accent wall. Soft, directional light from above (recessed or track fixtures) or from the sides (wall sconces) highlights texture and color without creating glare on your TV screen. If you’re installing new lighting, plan it before finishing the wall: running electrical to new fixtures is simpler before permanent materials go up.
Position lights so they illuminate the accent wall but not directly toward seating, harsh backlighting behind a TV causes eye strain. Dimmers let you adjust ambiance: smart bulbs let you change color temperature from warm to cool depending on time of day. This is where professionals typically step in: if new circuits or repositioning of existing outlets is needed, hire a licensed electrician to ensure safety and code compliance.
Before you start any accent wall project, confirm your studs, inspect for electrical wires or plumbing runs, and use a stud finder to map them. Never drill, nail, or cut into walls without knowing what’s behind them. Use safety gear appropriate to your material: dust masks for drywall or wood sanding, safety goggles for any cutting, and gloves for handling materials.
Paint preparation, wallpaper smoothing, and tile grout curing all require patience and proper drying time, rushing these is the fastest way to end up redoing work. Test your color, pattern, or material on a small section (or in samples) before committing. Accent walls are high-impact but also relatively forgiving: if you hate the choice, repainting or removing wallpaper is easier than replacing structural work. Interior design inspiration from Home Bunch shows how accent walls transform spaces when executed with careful planning and attention to detail.
Conclusion
Your TV accent wall doesn’t have to be boring white drywall. Whether you choose bold paint, textured wallpaper, wood paneling, stone, or tile, the approach is the same: prep meticulously, measure twice, and take your time. Start with a color or material sample, observe it in your actual lighting, and trust your instincts. Most projects are well within reach for a confident DIYer, though some (lighting, structural support, tile finishing) benefit from professional help. The result, a focal-point wall that elevates your entire living room, is worth the effort.